
When was the last time you thought about the air ducts hidden behind your walls, running through your crawl space, or snaking across your attic? For most homeowners, the ventilation system is a classic case of “out of sight, out of mind.” Yet, your ductwork acts as the respiratory system of your entire home. It is responsible for carrying conditioned air from your heating and cooling equipment directly to your living spaces.
When that respiratory system becomes clogged, disconnected, leaky, or structurally crushed, your entire HVAC system suffers. You may experience skyrocketing energy bills, hot and cold spots in different rooms, or poor indoor air quality that aggravates allergies.
If you are experiencing uneven airflow or high utility costs, it is time to schedule a professional inspection. But what actually happens when a certified technician arrives at your home? To help you understand this essential maintenance process, Zees AirConditioning Inc. has put together this ultimate step-by-step guide detailing exactly what to expect during a professional residential ductwork evaluation.
1. The Critical Role of Your Air Ducts
Before diving into the inspection process, it is helpful to understand why your air ducts require periodic professional attention. On average, a standard home loses roughly 20% to 30% of the air moving through its duct system due to leaks, holes, and poorly connected joints. This means you are paying for conditioned air that never actually reaches your living room, bedroom, or kitchen.
A comprehensive residential ductwork evaluation is a systematic inspection designed to locate these inefficiencies. By assessing the physical integrity, cleanliness, and layout of your ventilation system, certified specialists can determine exactly where your system is losing energy and how to restore it to peak operating efficiency.

2. Phase 1: The Initial Consultation & Homeowner Interview
Every professional evaluation begins with a conversation. An expert technician will not just start cutting holes in your drywall; they will first want to understand your daily living experience.
During this stage, the technician will typically ask you:
- Which rooms feel too hot or too cold? (This points to localized airflow issues or unbalanced duct runs).
- Have you noticed a sudden rise in your monthly energy bills? (This often indicates a major disconnect or tear in a main duct trunk).
- Do you smell musty odors when your heating or AC kicks on? (This suggests moisture intrusion or mold growth inside the ducts).
- Does dust accumulate rapidly on your furniture after cleaning? (This is a classic sign of dusty, unsealed return ducts drawing in attic or crawl space air).
By gathering these behavioral symptoms, the inspector can pinpoint specific target areas to prioritize during the physical assessment.
3. Phase 2: Visual Inspection of Exposed Ductwork
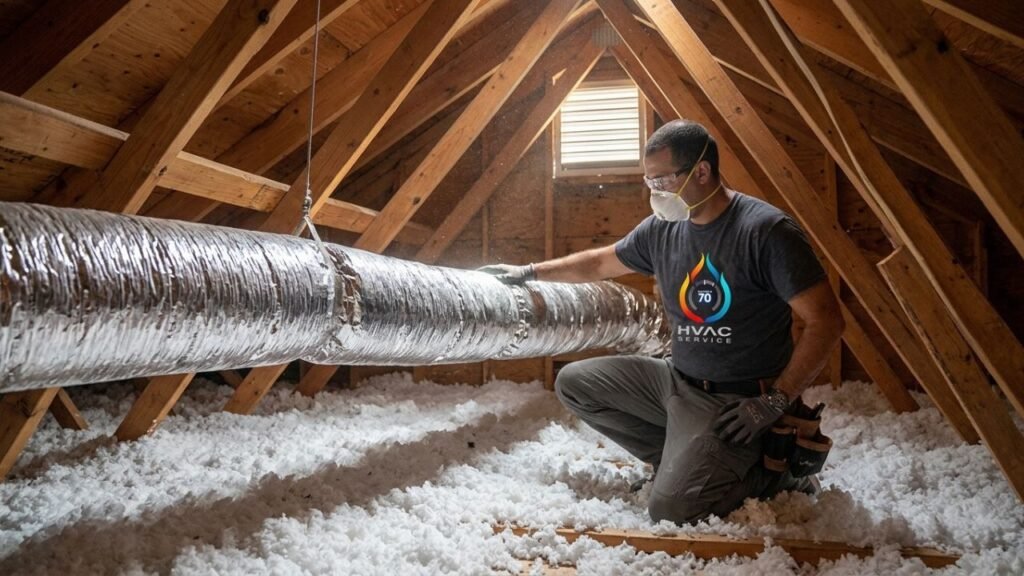
Once the technician understands your home’s specific symptoms, they will begin the physical evaluation. The first step is a thorough visual inspection of all visible, accessible portions of your duct system. This typically requires entering the attic, crawl space, basement, or utility closets.
What the Inspector Looks For:
- ✔ Physical Damage: Looking for collapsed flexible ducts, crushed sections, or metal pipes that have been dented.
- ✔ Loose Connections: Identifying joint separations where sections of metal or flex duct meet.
- ✔ Failed Sealants: Inspecting old, peeling duct tape. (Despite its name, standard duct tape dry-rots quickly and is not suitable for sealing air ducts).
- ✔ Insulation Integrity: Checking if the external insulation wrapping the ducts is wet, torn, missing, or chewed through by pests.
- ✔ Water Damage & Biological Growth: Looking for condensation pooling or dark spotting on or around the duct material.
4. Phase 3: Diagnostic Airflow and Static Pressure Testing
While a visual inspection can catch obvious tears, it cannot tell the whole story. To truly understand how your system is performing, technicians use specialized diagnostic tools to measure air pressure and velocity.
static Pressure Testing
Think of static pressure like blood pressure for your HVAC system. If the pressure is too high, your system is working too hard to push air through restricted pathways. If it is too low, air is escaping before it can build up enough force to circulate.
The technician will insert specialized pressure probes (manometers) into the supply and return plenums to measure the resistance of the air. This helps identify:
- Under-designed or choked duct runs.
- Severely clogged air filters or coils.
- Internal obstructions within the duct lines.
Airflow Velocity Measurements
Using an anemometer or a flow hood, the technician will measure the volume of air (measured in Cubic Feet per Minute, or CFM) exiting your individual room registers.
| Room Category | Target Airflow Status | Common Issues Found |
| Living Areas / Bedrooms | Steady, quiet, balanced airflow | Low CFM due to long duct runs, kinks in flex ductwork, or closed dampers. |
| Kitchens / Bathrooms | Controlled exhaust & supply balance | Backdrafting or localized pressure imbalances. |
| Unconditioned Spaces | Zero air leakage | Supply or return ducts dumping conditioned air directly into attics/crawl spaces. |

5. Phase 4: Duct Leakage Testing (The Duct Blaster Test)
To quantify exactly how much air is escaping from your system, technicians perform a specialized diagnostic called a Duct Blaster Test.
Here is how the test works:
- Seal the Registers: The technician temporarily seals all the supply and return registers throughout your home with adhesive plastic film.
- Attach the Fan: A specialized calibrated fan system (the “Duct Blaster”) is connected to your central return grille or the air handler cabinet.
- Pressurize the System: The fan blows air into the duct system, pressurizing it to a standard test level.
- Measure the Leakage: The diagnostic computer measures how much air is required to maintain that pressure. If your ducts are perfectly sealed, very little air is needed. If there are leaks, the fan must work harder to replace the escaping air.
The results of this test provide a precise percentage of total system duct leakage, giving you a clear metric of your home’s energy waste.
6. Phase 5: Thermal Imaging and Inner-Duct Video Inspections
For a truly thorough evaluation, modern HVAC professionals leverage high-tech visualization tools.
Infrared Thermal Imaging
Using infrared cameras, a technician can scan your walls and ceilings while your system is running. Because conditioned air is a different temperature than your wall cavities, any significant leak will show up on the camera as a bright thermal plume. This allows inspectors to find hidden, inaccessible leaks inside finished walls without tearing down your drywall.
Borescope Video Inspection
By feeding a tiny, fiber-optic camera directly into your ductwork through an open vent, the inspector can visually map the interior of your system. This allows them to check for:
- Pest infestations or nesting materials.
- Heavy accumulations of dust, pet dander, and construction debris.
- Internal corrosion in older sheet metal ducts.
- Loose internal acoustic liners that may be blocking airflow.
7. Comparing Types of Ductwork Material
During your evaluation, the technician will note what type of ductwork is installed in your home. Different materials have distinct lifespans and unique vulnerabilities:
| Duct Type | Material Composition | Average Lifespan | Pros | Cons / Vulnerabilities |
| Rigid Sheet Metal | Galvanized steel or aluminum | 30 to 50+ Years | Highly durable, smooth interior allows optimal airflow, easy to clean, resistant to mold. | Expensive to install, requires meticulous manual sealing at every seam and joint. |
| Fiberglass Duct Board | Compressed fiberglass fibers | 20 to 30 Years | Built-in thermal insulation, dampens system noise naturally. | Rough interior can trap dust, difficult to clean without damaging the fibers, vulnerable to moisture. |
| Flexible Ductwork | Polyester, wire helix, foil/mylar wrap | 10 to 15 Years | Affordable, easy to install in tight spaces, highly versatile. | Extremely easy to kink, puncture, or crush; prone to sagging if not |
8. Why Your Ductwork Design and Layout Matter
A ductwork evaluation is not just about finding leaks; it is also about checking the overall engineering design of your system. Even if your ducts are perfectly sealed, an improper layout will prevent your home from reaching the comfort levels you desire.
Key design elements analyzed during a professional assessment include:
- Sizing Balance: Are the supply ducts large enough to handle the volume of air your AC unit produces? If they are too small, they will choke the system, leading to premature compressor failure.
- Return Path Availability: Your system needs to draw in as much air as it pushes out. If your home lacks sufficient return grilles, or if bedroom doors are kept closed without jump ducts or transfer grilles, pressure imbalances will occur.
- Duct Runs and Bends: Excessively long runs or sharp 90-degree turns in flexible ducting create massive static resistance, drastically reducing the air velocity reaching the end of the line.
If your system suffers from fundamental design flaws, simply sealing the joints will not solve your airflow issues. In these situations, structural improvements are necessary. For professional, code-compliant system redesigns, you can rely on the expert team at Zees AirConditioning Inc. to optimize your home’s layout. We specialize in comprehensive, custom solutions including professional duct work in New Orleans, LA to ensure perfect pressure balance and unrestricted airflow throughout your entire property.
9. Common Problems Uncovered During an Evaluation
A professional evaluation will usually identify one or more of the following common system issues:
A. Leaky and Unsealed Joints
Most air leaks occur at the connections between different sections of ductwork, or where the branches connect to the main trunk line. Sealing these joints with professional-grade mastic sealant or foil-backed tape can immediately improve your system’s efficiency.
B. Poorly Supported and Sagging Flex Ducts
Flexible ductwork must be supported at regular intervals. When installers use thin wire hanger straps or fail to support the runs properly, the ducts will sag, pinch, or drape over ceiling joists. This creates sharp bends that severely restrict airflow.
C. Leaky Return Plenums
The return plenum is the box connected to the intake side of your heating and air conditioning unit. Because this area is under negative pressure, a leak here will actively suck unconditioned air, attic dust, insulation fibers, and crawl space humidity directly into your HVAC unit and distribute it to your living spaces.
D. Damaged or Deteriorated Insulation
Uninsulated ducts running through hot attics or cold crawl spaces act as thermal conductors. This means your cool air is warmed up (and your warm air is cooled down) before it ever reaches your rooms. Keeping insulation intact prevents this thermal loss.
10. The Ultimate Homeowner Benefits of a Duct Evaluation
Investing in a thorough ductwork assessment offers long-term financial, operational, and physical health benefits:
- Dramatic Energy Savings: By sealing leaks and optimizing airflow pathways, you can slash your heating and cooling utility costs by up to 30%.
- Improved Home Comfort: Say goodbye to hot and cold spots. A balanced duct system delivers uniform temperatures to every room in your house.
- Cleaner Indoor Air Quality: Sealing your ducts prevents musty crawl space air, insulation particulate, and attic dust from infiltrating your living areas.
- Extended HVAC Equipment Lifespan: When air flows freely, your blower motor, compressor, and heat exchanger do not have to work overtime, significantly reducing wear and tear.
11. What Happens After Your Evaluation?

At the conclusion of your residential ductwork evaluation, the technician will provide you with a detailed, transparent diagnostic report. This report will outline:
- Your system’s total measured static pressure.
- The estimated percentage of duct leakage calculated from diagnostic testing.
- A mapped-out list of any damaged, disconnected, or poorly routed duct sections.
- Clear, prioritized recommendations for remediation.
The Diagnostic Report Results
Once your evaluation is complete, the findings will fall into one of three main categories, each requiring a specific professional action:
- Minor Leaks & Wear ➔ Professional Duct Sealing & Mastic Application
- What this means: Your system is structurally sound, but loose joints and standard age wear are bleeding conditioned air. Applying high-grade mastic sealant immediately fixes this energy loss.
- Heavy Contamination ➔ Air Duct Cleaning & Sanitization
- What this means: Thick layers of dust, pet dander, or allergen allergens are choking your airflow and ruining your air quality. A deep-clean restores clear, healthy breathing paths.
- Structural Damage ➔ Duct Repair, Relocation, or Complete Replacement
- What this means: Severely crushed flexible lines, disconnected metal runs, or poor original design layouts mean parts of your ventilation require full physical renewal to function.
Ready to Restore Your Home’s Airflow and Efficiency?
If you are dealing with uneven temperatures, dusty rooms, or soaring energy bills in the Greater New Orleans area, do not let bad ductwork drain your wallet.
Contact Zees AirConditioning Inc. today at +1 504-912-0490 to schedule your professional residential ductwork evaluation. Our certified technicians will inspect, diagnose, and optimize your ventilation system to keep your home comfortable and energy-efficient year-round.
FAQs
For a standard single-family home, a comprehensive evaluation usually takes between 1.5 to 3 hours. The exact duration depends on the overall size of your home, the accessibility of your attic or crawlspace, and whether the technician needs to perform advanced diagnostics like a Duct Blaster Test.
It is highly recommended to have your air ducts professionally evaluated every 3 to 5 years. However, you should schedule an inspection immediately if you notice sudden spikes in your energy bills, persistent hot or cold spots across different rooms, or excessive dust settling on your furniture shortly after cleaning.
Yes, absolutely. On average, a standard residential duct system loses roughly 20% to 30% of its conditioned air through unsealed joints, tears, and minor cracks. By identifying these specific leakage points during an evaluation, you can target repairs that keep your air inside the living space, reducing the workload on your HVAC system and dropping your utility costs.
Technicians use specialized high-tech visualization tools to inspect inaccessible spaces without tearing down drywall. They use infrared thermal imaging cameras to track thermal plumes where conditioned air escapes into wall cavities, alongside flexible borescope video cameras fed directly into the vent runs to view the interior structural conditions.
Yes. The final diagnostic report clearly categorizes the condition of your system. It will pinpoint whether your air ducts simply have heavy dust accumulation that requires cleaning and sanitization, localized leaks that need mastic sealing, or structural collapses that call for duct repair or complete replacement.
You only need to ensure clear, unobstructed access to your indoor air handler/furnace, all supply and return registers in every room, and the entrance points to your attic, basement, or crawlspace. Clearing items away from these zones beforehand allows the technician to complete the diagnostic tests efficiently.

